
Tuesday 26 April 2016
2D Character Project Part 3 - Character Turnaround
To make the final image easier to conceptualize, I started on the turnaround first, using the earlier sketches. This helped me determine the characters proportions and how they would stand/move.
The sections of the body that would be subject to a lot of movement, such as the shoulders were designed to resemble interlinking teeth/membranes. The ridges on the characters waist are also styled after membranes, muscles and more flexible parts of a persons anatomy.
When concepting the arms, and how the armour would fit together, I cam up with the ideas of the arms acting as the characters young, allowing them different abilities for the character to use.
For the rest of the character, I added spines and twin tails on the characters lower half to balance against the characters wings.
When deciding on colours, I knew I wanted the armour to appear very organic. For that reason the hard surfaces are coloured like bones but shift into browns and greens, as if they were molding or warping. The parts in between have colours relating to muscle structure, but like the shell, are damaged or distorted, becoming more purplish or black. The exposed flesh of the wearer would have been grey originally but I felt that a more vibrant shade of red would still fit with the colour scheme of the armour and make it clearer that someone is inside it.
The back view was important to show how the characters wings attaches to their body, how it's legs bend and to highlight the asymmetrical features on it's lower half.
The back view allowed me to add some extra details to the characters tails by adding a saturated red pattern.
 |
| Initial Body Lineart |
 |
| Lineart: Arms and Legs |
 |
| Lineart: All features added |
 |
| Coloured Front Veiw |
 |
| Front View with wings |
 |
| Lineart: Back View |
 |
| Coloured Back View |
 |
| Lineart: Side View - Body |
 |
| Lineart: Side View - Arms and legs |
 |
| Coloured Side View - Body |
 |
| Coloured Side View - Arms and Legs |
Thursday 31 March 2016
2D Character Project Part 2 - Sketching character parts
I decided to draw the front, back and side views of the character first, as it would be easier to redraw it posed, than to draw the different views using a dramatic pose for reference. I also decided to design the different parts of the body in sections, since the character is essentially armour and would be divided up into various parts.

I liked various parts of these designs and was able to incorporate them into the final design for the character.
When designing the wings, I wanted a hybrid of insect like wings, and skeletal wings, that would be capable of a high speed maneuverability. I took the basis of a bat's wings and changed it to be made of chitin, and replaced the membrane/fingers with segment bone in the shape of a dragonfly's wing. The wings can move entirely at the joint for powerful wing beats, but move at high frequencies at the "wrist" for when the character hovers.

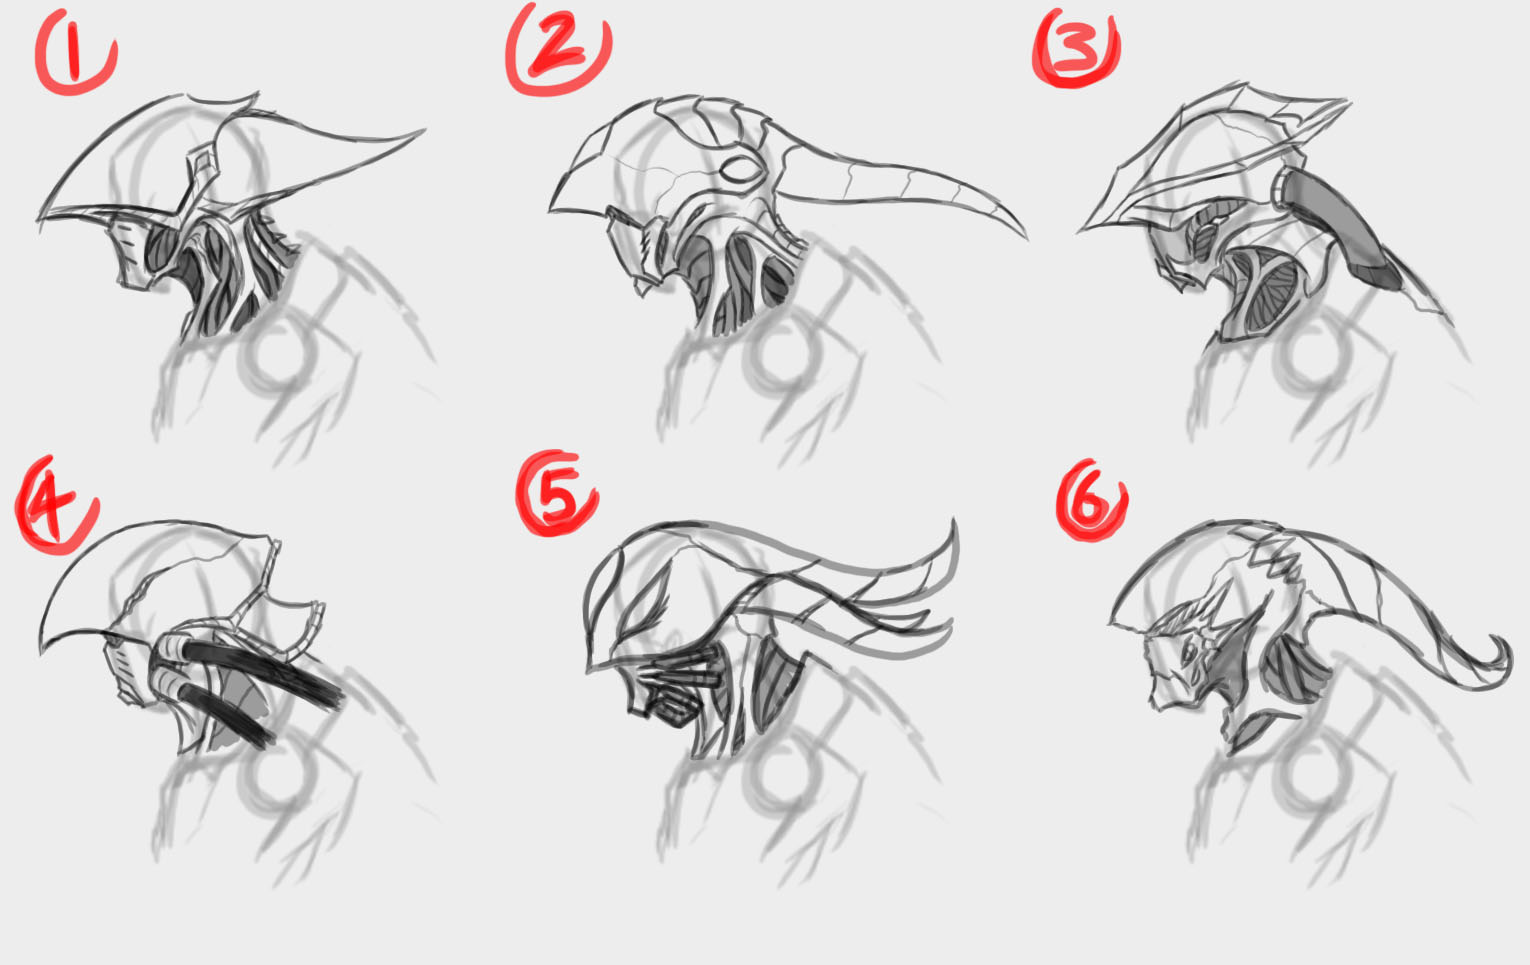
The head was supposed to resemble some kind of alien head piece, similar to creatures like the xenomorph with angular or elongated proportions. It could also include some features that I've used earlier, such as the organic tubing and parts that resemble breathing apparatus. I also liked the head tails in designs 2, 5 and 6 since they add more flow to the characters head in movement.

I decided to have the arms be different on either side, allowing for different attacks and abilities. However I still wanted the arms to have some unifying qualities, such as the shape of the elbow or he number of spikes on the arms top.
Looking at the initial designs, I decided to number 3 primarily, but sharpen some of the features to make the arms look like aggressive natural weapons. I also added facial features such as eyes and teeth to the arms, both to make them look like they were feeding on the wearer and to feed into an idea of the arms being the armour's offspring.

Given the shape in which I pictured the character, I imagined that their legs would by quite thin, but very long and bent, much like a mosqitos. After a few sketches, I settled on a 3 part leg ending in a clawed foot, with organic cables running between the different segments. This cables lead to organic boosters which would aid the characters flight


I liked various parts of these designs and was able to incorporate them into the final design for the character.
- I wanted the armour to feature some parts that would seem unmistakenly mechanical, such as wires, pipes or bolts. Having piping lead into the characters head, to resemble a breathing apparatus achieved this and also made it more aparent that there was something "living inside" the armour.
- I liked the idea of a very thick, muscle support structure for the characters head/helmet as well at the sinew like supports on the armour's mid-section and the shape of this designs chest armour. I felt the wings on this design were to bulky and the shoulders didn't form an interesting shape.
- This design was supposed to be more streamlined and simple, but didn't have that alien sense of menace that I wanted to achieve. It did however, give me some ideas for the characters back, which I used later.

- This design was focus on making it asymmetrical and think of an interesting/unusual way for the armour to form around it's host's body. Unfortunately, it was to much of a bizarre shape but I did like the spiked shapes ate the armour's base, which again, I expanded on later in the project.
- This was another simple design, and like the last one lacked a sense of menace to it, but contributed to the shape of the characters shoulder pads. It also gave me an opportunity to try a different organic design, instead of the more chiten based designs in the other sketches.
- This final design, contributed the idea of the armour literally feeding off it''s host, by biting into it. This also created a way for the armour to lock together around the host.

When designing the wings, I wanted a hybrid of insect like wings, and skeletal wings, that would be capable of a high speed maneuverability. I took the basis of a bat's wings and changed it to be made of chitin, and replaced the membrane/fingers with segment bone in the shape of a dragonfly's wing. The wings can move entirely at the joint for powerful wing beats, but move at high frequencies at the "wrist" for when the character hovers.

The head was supposed to resemble some kind of alien head piece, similar to creatures like the xenomorph with angular or elongated proportions. It could also include some features that I've used earlier, such as the organic tubing and parts that resemble breathing apparatus. I also liked the head tails in designs 2, 5 and 6 since they add more flow to the characters head in movement.
I decided to have the arms be different on either side, allowing for different attacks and abilities. However I still wanted the arms to have some unifying qualities, such as the shape of the elbow or he number of spikes on the arms top.
Looking at the initial designs, I decided to number 3 primarily, but sharpen some of the features to make the arms look like aggressive natural weapons. I also added facial features such as eyes and teeth to the arms, both to make them look like they were feeding on the wearer and to feed into an idea of the arms being the armour's offspring.

Given the shape in which I pictured the character, I imagined that their legs would by quite thin, but very long and bent, much like a mosqitos. After a few sketches, I settled on a 3 part leg ending in a clawed foot, with organic cables running between the different segments. This cables lead to organic boosters which would aid the characters flight

Thursday 18 February 2016
2D Character Project Part 1 - Concepting the Character
To determine the characters design, I decided to set
myself certain objects to achieve whilst designing it. I wanted to create a
character that would feature in a fast paced 2D fighting game. That character
would have to have an intimidating design, recognisable silhouette, ranged
capabilities, grappling abilities, high mobility capabilities and high
durability. I also wanted to create a character with some form of sentient
armour that either worked independently from the wearer or simply feed of off
them.


These later example feature armour that more closely resembles a separate living entity, with exposed nerves, muscles and ligaments conflicted with bone or chitin armour. These examples are clearly more alive looking than the others, and contrast from the shape or colour of their wearer to further separate them.
Wednesday 20 January 2016

Thursday 7 January 2016

Thursday 10 December 2015
High Poly Asset Modelling
The object I decided to model for my High Poly Asset, is the
sword Chaoseater, which is used by the protagonist of the videogame Darksiders.

The sword features a mixture of sharp and jagged edges, carved, organic looking
faces and a mixture of different metals for the separate components of the
blade.
 |
| High poly model in Maya |


To create the swords basic shape, I used the Quad draw
feature to get the very specific shapes that the sword has. Since the sword is asymmetrical,
I had to mirror it on a different plane than other swords. This carried over
into the modelling process in Zbrush, which allowed me to further enhance the
quality of the blades details, especially the faces.


 |
| Completed High Poly Model |
However, parts of the swords, such as the more pronounced
teeth and the detailing near the hilt that I primarily modelled in Zbrush
suffered distortion when they were completed and this unfortunately carried
into the Low Poly model as well.
Following the high poly models completion, I used decimation to reduce the poly count and make the low poly version.
 |
| Colour Map |
 |
| Textures applied using Quixel |
 |
| Without Textures in Unreal 4 |
 |
| With Textures in Unreal 4 |
Subscribe to:
Posts (Atom)